How Mentoring Works
Topics
- Using the Web Site When Seeking Mentorship
- Using the Web Site as a Mentor
- Using the Video Call Page
- Testing Your Computer for Video Calls
Using the Web Site When Seeking Mentorship
- To get started simply go to Browse Mentors and find an expert to have a call with. Click the Purchase Call button and complete the form. You will be able to propose a time and provide an estimated duration and payment information. Note that while your credit card will be charged immediately for the estimated time, once the call completes you will either receive a refund for any unused time or an additional charge will be made if you went over the estimated time.
- The expert will be notified via email and they will be able to either accept the call or propose a different time.
- Whenever new times are proposed the other person will receive an email with those new times and can either accept one of them or propose new ones.
- Once a time is accepted, both the customer and the expert will receive an email with links for joining the call. This email also contains a calendar invite.
- At the time of the call both the customer and the expert join the call. Please see the Using the Video Call Page section for more information on the video call controls, including how you can share your screen.
- When you are finished with the call you can click the red end call button. Doing so will allow you to leave a review for the mentor.

Using the Web Site as a Mentor
- The first step is to apply to be a mentor. During the application process you will be able to provide information that will be displayed on your profile, including your rate.
- You will be notified of your application decision within a couple of days. If your application is approved you will be listed on the site as a mentor. You will be able to modify the information in your profile as well as configure your payout details. We currently support Stripe and PayPal for paying mentors. You can configure this under the My Account page once you are an approved mentor. Note that you can configure this at any time, including after a call takes place.
- When a user purchases a call with you they will provide details for the call and propose three times. You will be notified via email and will be able to accept a time or propose three new times.
- Whenever new times are proposed the other person will receive an email with those new times and can either accept one of them or propose new ones.
- Once a time is accepted, both the customer and the expert will receive an email with links for joining the call. This email also contains a calendar invite.
- At the time of the call both the customer and the expert join the call. Please see the Using the Video Call Page section for more information on the video call controls, including how you can share your screen.
- When you are finished with the call you can click the red end call button.
Using the Video Call Page
What does each button do on a video call?

The following is a description of each icon in the image above, from left to right:
- Camera On: Clicking this will turn off your camera so that the other person will not see you. You can toggle this on or off and the title will change to reflect whether your camera is on or off.
- Microphone: Clicking this will mute your microphone so that the other person will not hear you. You can toggle this on or off and the icon will show a line through it when you are muted.
- Share Screen: Click this to share your screen. If you have multiple monitors your browser may prompt you to select which screen to share.
- Layout: This is only active when you are viewing a shared screen. It allows you to change the layout. Please see How do I share my screen? for more details.
- End Call: Click this button to end the call.
How do I share my screen?
The following are the steps to share your screen:- Click the Share Screen icon. If you have multiple monitors your browser may prompt you to select which screen to share.
- The other person will have the icons shown below so that they can toggle between different views. The left icon will maximize their view of your screen. The middle icon changes to a grid format where each participant and the screen takes up an equal amount of space. The default is for the screen share to be shown on the left and the participants to be shown on the right.

- When you are done sharing your screen you can click Stop Sharing.
- When viewing a shared screen using the maximized view you can click the following icon located at the top right of the screen. This will stop the screen from being maximized.

Testing Your Computer for Video Calls
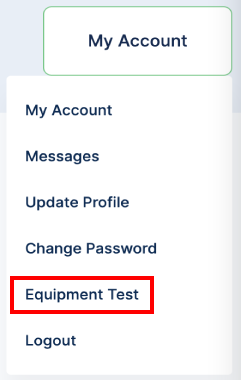
- We recommend that prior to joining your first call that you confirm your computer will work for the call. To do this you can log into the web site and click the Equipment Test link. You can find this link under the Member Area navigation area.
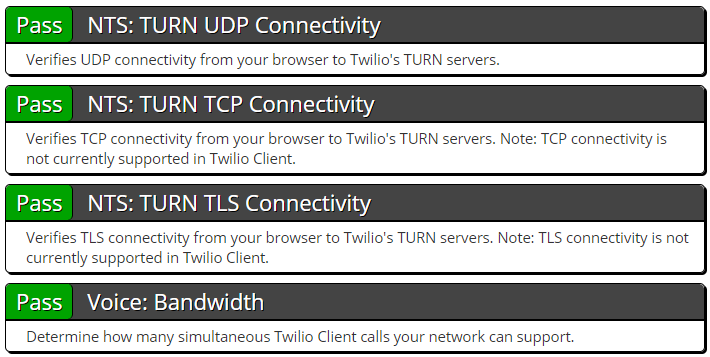
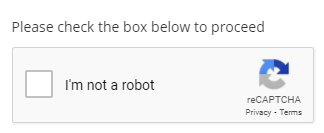
- The test will begin automatically although you may need to confirm that you are not a robot as shown in the image below.
- As the page tests your equipment you will see an indication of whether the test passes or fails. If any of the tests fail and you have questions on whether you will be able to perform a call please contact us with a screen shot of the test results.